在 Lighttpd 上用 CertBot 安装 Let’s Encrypt SSL 证书

本教程仅支持 ubuntu 和 debian 系统
- 如果你是第一次配置用 https + 域名来访问网站,建议先阅读下面这篇教程
设置 https + 域名访问网站的最简单方法 - 不需要 SSL 证书,通过 Cloudflare 实现
现在的网站,https 加密传输已经是标准配置了,不支持 https 的网站基本已经不存在了,也没法存活了。但是新手自己配置 https + 域名还是不太容易,这篇文章教大家一个最简单的方法配置 https + 域名 域名的购买和在 Cloudflare 上托管就不在这里说明了,网上有很多很好的教程,这里主要讲一下不申请 SSL 证书,用 Cloudflare 实现 https + 域名访问自己的搭建的网站。 最简单的网站( IP : 80 端口)(端口不是 80 的网站看下面) 如果搭建的网站或是网页地址是 http://142.250.115.113:80,IP 是不支持 https 的,所以只能是 http ,默认端口是 80,所以 80 也可以不加,

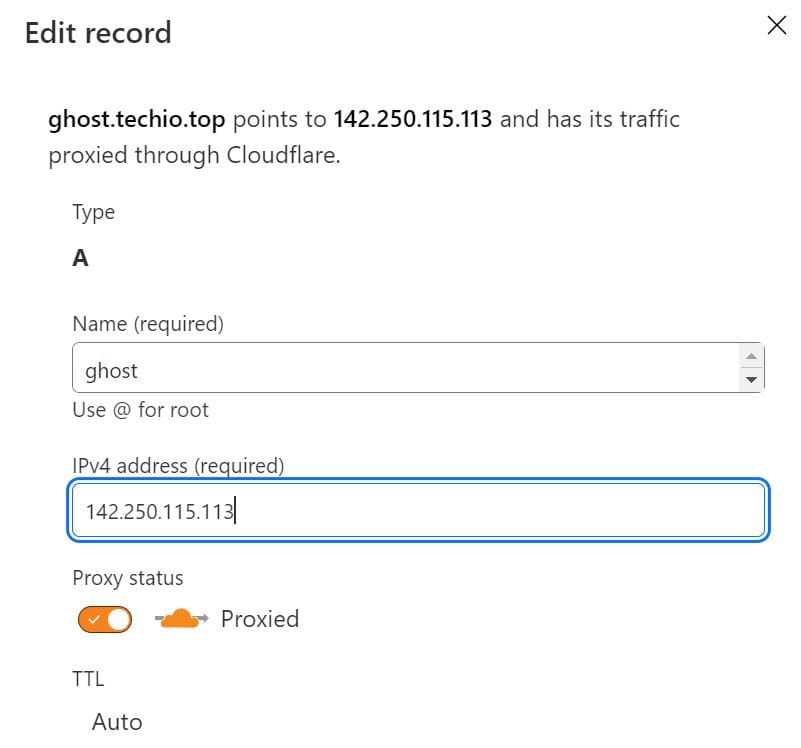
- 如果你想创建 SSL 证书,然后用域名 https://ghost.techio.top 来访问 IP 142.250.115.113
- 先在 CloudFlare 里创建 DNS 记录,把域名指向 IP 。点击左侧的 [DNS] -> [Records] -> [Add record],[Type] 选 [A],添加域名指向网站服务器 IP ,完成后 [Save]

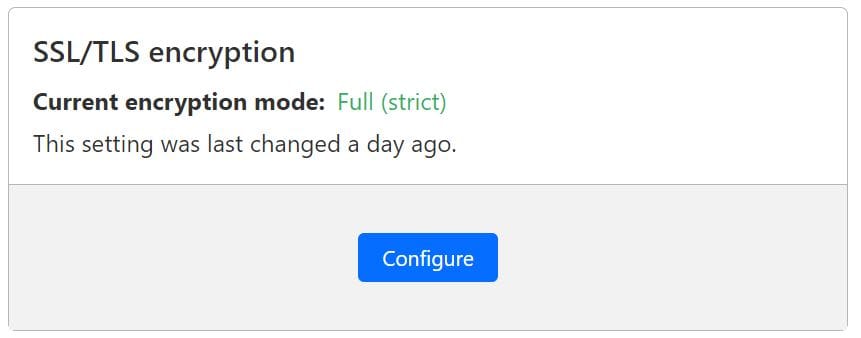
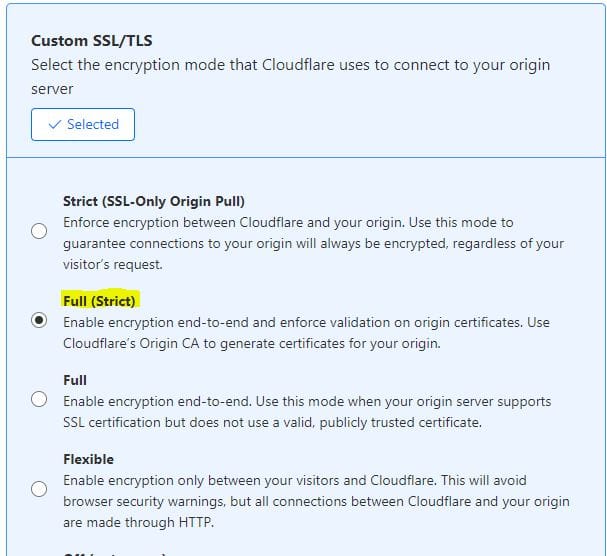
- 设置 SSL 模式为 [Full (strict)] ,点击左侧的 [SSL/TLS],然后点击 [Configure],把 [SSL/TLS] 设置成 [Full (strict)]


- 在 VPS 上安装 CertBot SSL 证书生成程序
sudo apt install certbot -y- 停止 Lighttpd 服务,CertBot 生成证书时,需要通过网络验证域名的指向 IP ,会用到 80 端口,所以要生把 Lighttpd 服务停止。
sudo systemctl stop lighttpd- 用 CertBot 创建证书
sudo certbot certonly --standalone -d ghost.techio.top- 证书创建后再启动 Lighttpd 服务
sudo systemctl start lighttpd- 修改 Lighttpd 配置文件
sudo nano /etc/lighttpd/lighttpd.conf- 在文件最后加入下面内容
$SERVER["socket"] == ":443" {
    ssl.engine = "enable"
    ssl.pemfile = "/etc/letsencrypt/live/ghost.techio.top/fullchain.pem"
    ssl.privkey = "/etc/letsencrypt/live/ghost.techio.top/privkey.pem"
}- 重新启动 Lighttpd 服务
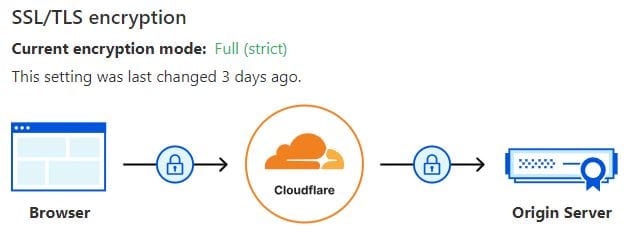
sudo systemctl restart lighttpd- 完成,现在可以用 http://ghost.techio.top 来访问网站了,而且 SSL 的模式是 Full (strict) ,也就是说所有的传输都是加密传输,可以保证数据的传输安全。

- 给网站创建 SSL 证书有很多种方法,这上面介绍的只是其中的一种,如果网站不多的话,这是比较简单的一种方法。如果网站比较多,而且需要反向代理 (reverse proxy) 的话,也推荐使用 Nginx Reverse Proxy Manager 来申请证书和配置反向代理。
- 如果需要手动更新证书的话,可以用下面这条命令
sudo certbot renew